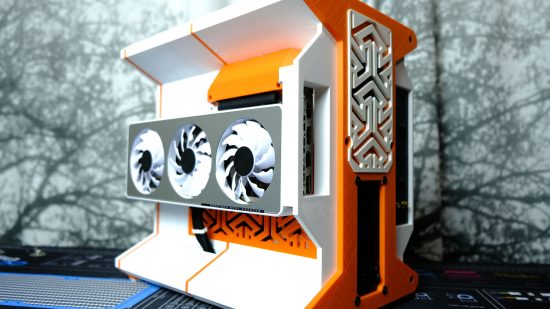
Not only does this orange and white PC build look absolutely gorgeous, but it also uses a completely 3D-printed PC case. With clever use of a Minifactory Innovator, and two Ultimaker 2 Extended+ 3D printers, PC modder Antti Väisänen made a water-cooled PC build that’s entirely unique.
Thanks to our rapidly growing PC building Facebook page, we’ve seen many custom gaming PCs, from mods based on existing case designs to scratch PC builds. You can even submit yours for consideration right here. Here Antti guides us through the creation of his 3D-printed case.
The Thing is my second 3D-printed case, following the creation of AV3D, a machine I built for the Cooler Master Case Mod World Series (CMWS) 2018 modding competition. That was a bigger ATX case but this time I wanted to try something a little smaller.
The inspiration for this build came one night following a conversation with my wife. I’d said I wanted to make my own mini-ITX case design but didn’t know what it should look like, and she assured me I’d figure it out in my sleep.
Sure enough, the next day I woke up and the design had come to me, so I hopped onto my computer and started to draw. It took three long weeks of drawing and 3D modeling but eventually I came up with the basic design.
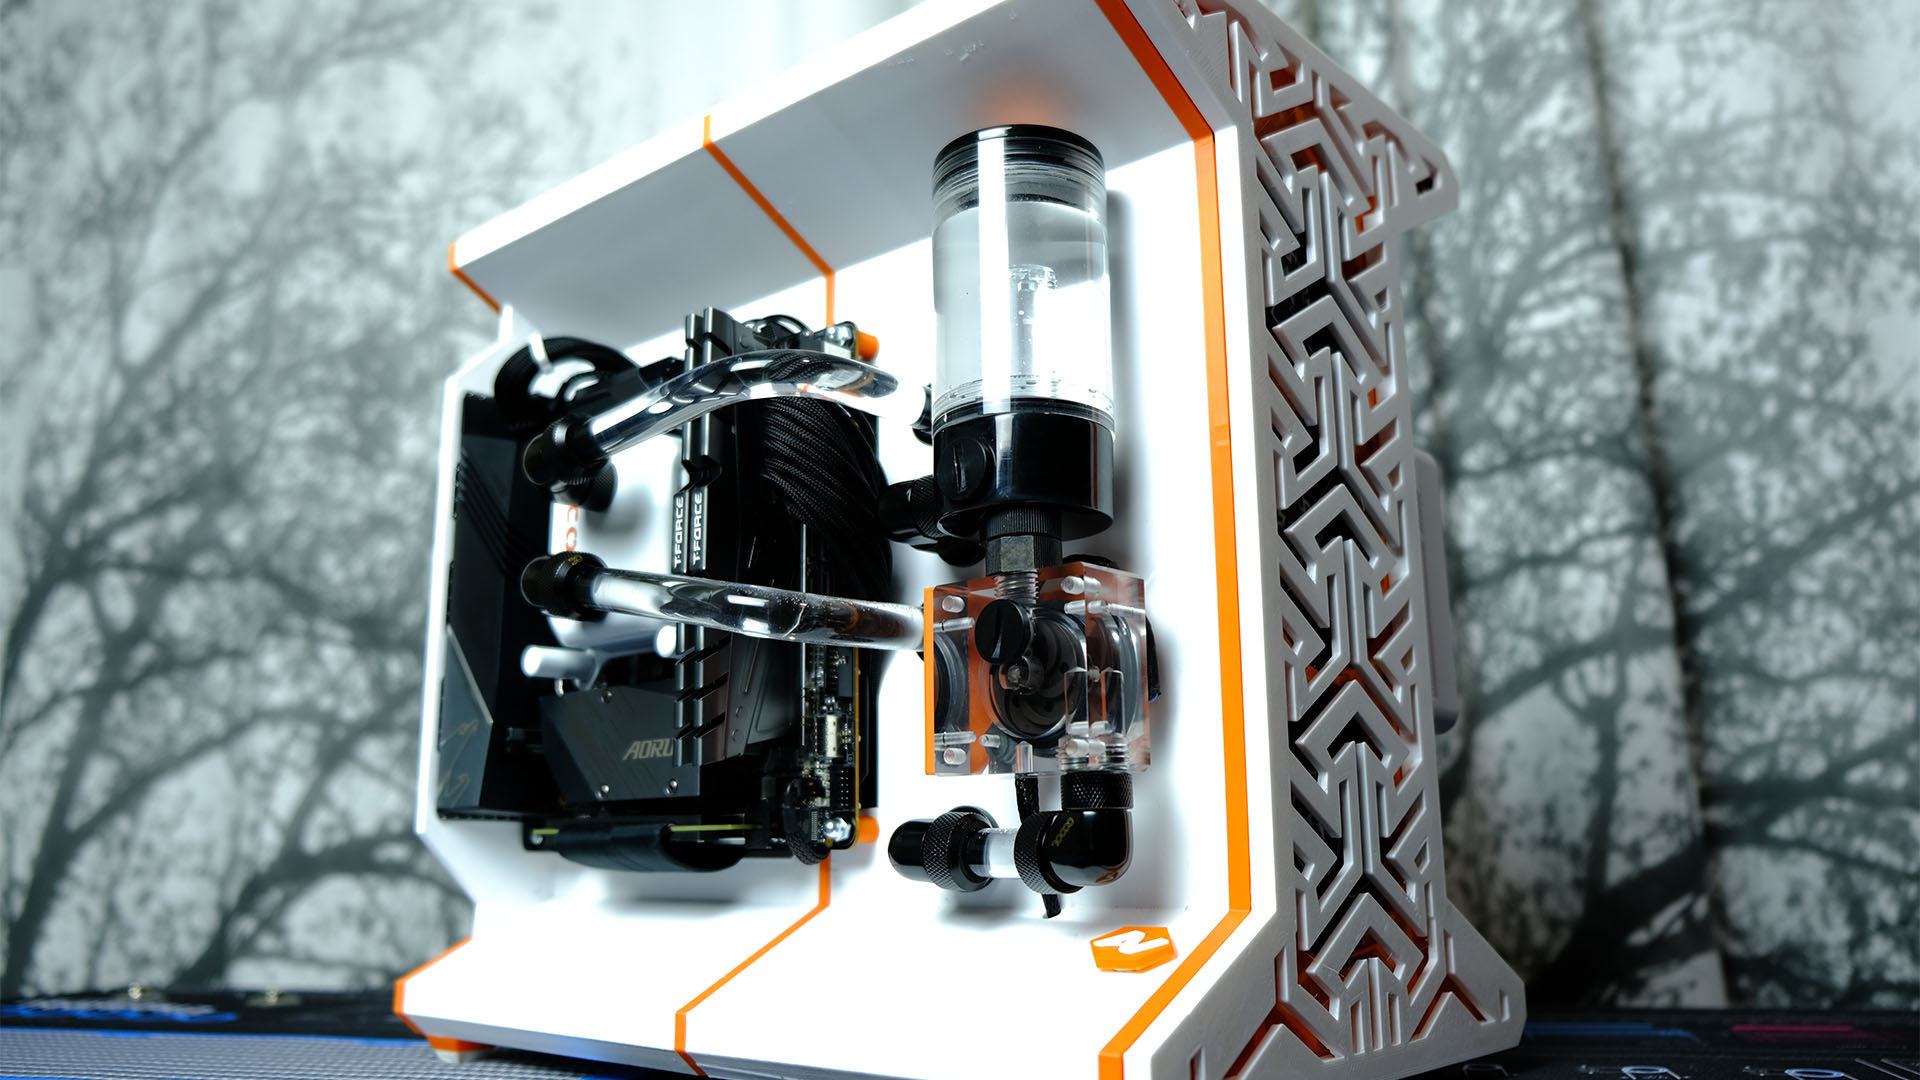
At this point, I didn’t have any hardware or water-cooling components, so I had a tough time figuring out some of the key case dimensions. Then it hit me like lightning out of a clear sky; I did have something that I could use, but it just happened to be in my current PC.
There was an Alphacool 3 x 80mm radiator that I could measure, so I pulled my computer to pieces and started to design the case to fit the radiator. Then I found out that Alphacool has 3D models for their parts, so I destroyed my current computer for nothing. You live and learn. After I found the 3D models, it was easy to place all of the water-cooling parts in my model and figure out the final case dimensions.
Although I was able to finalize the dimensions for the water-cooling components, I still didn’t have a motherboard or graphics card, so I had to use some generic 3D models to figure out the best layout. Thankfully, the key parts such as the mounting screws are standardized, and other than graphics card length, there aren’t too many other aspects of the design of these components that varies too much.
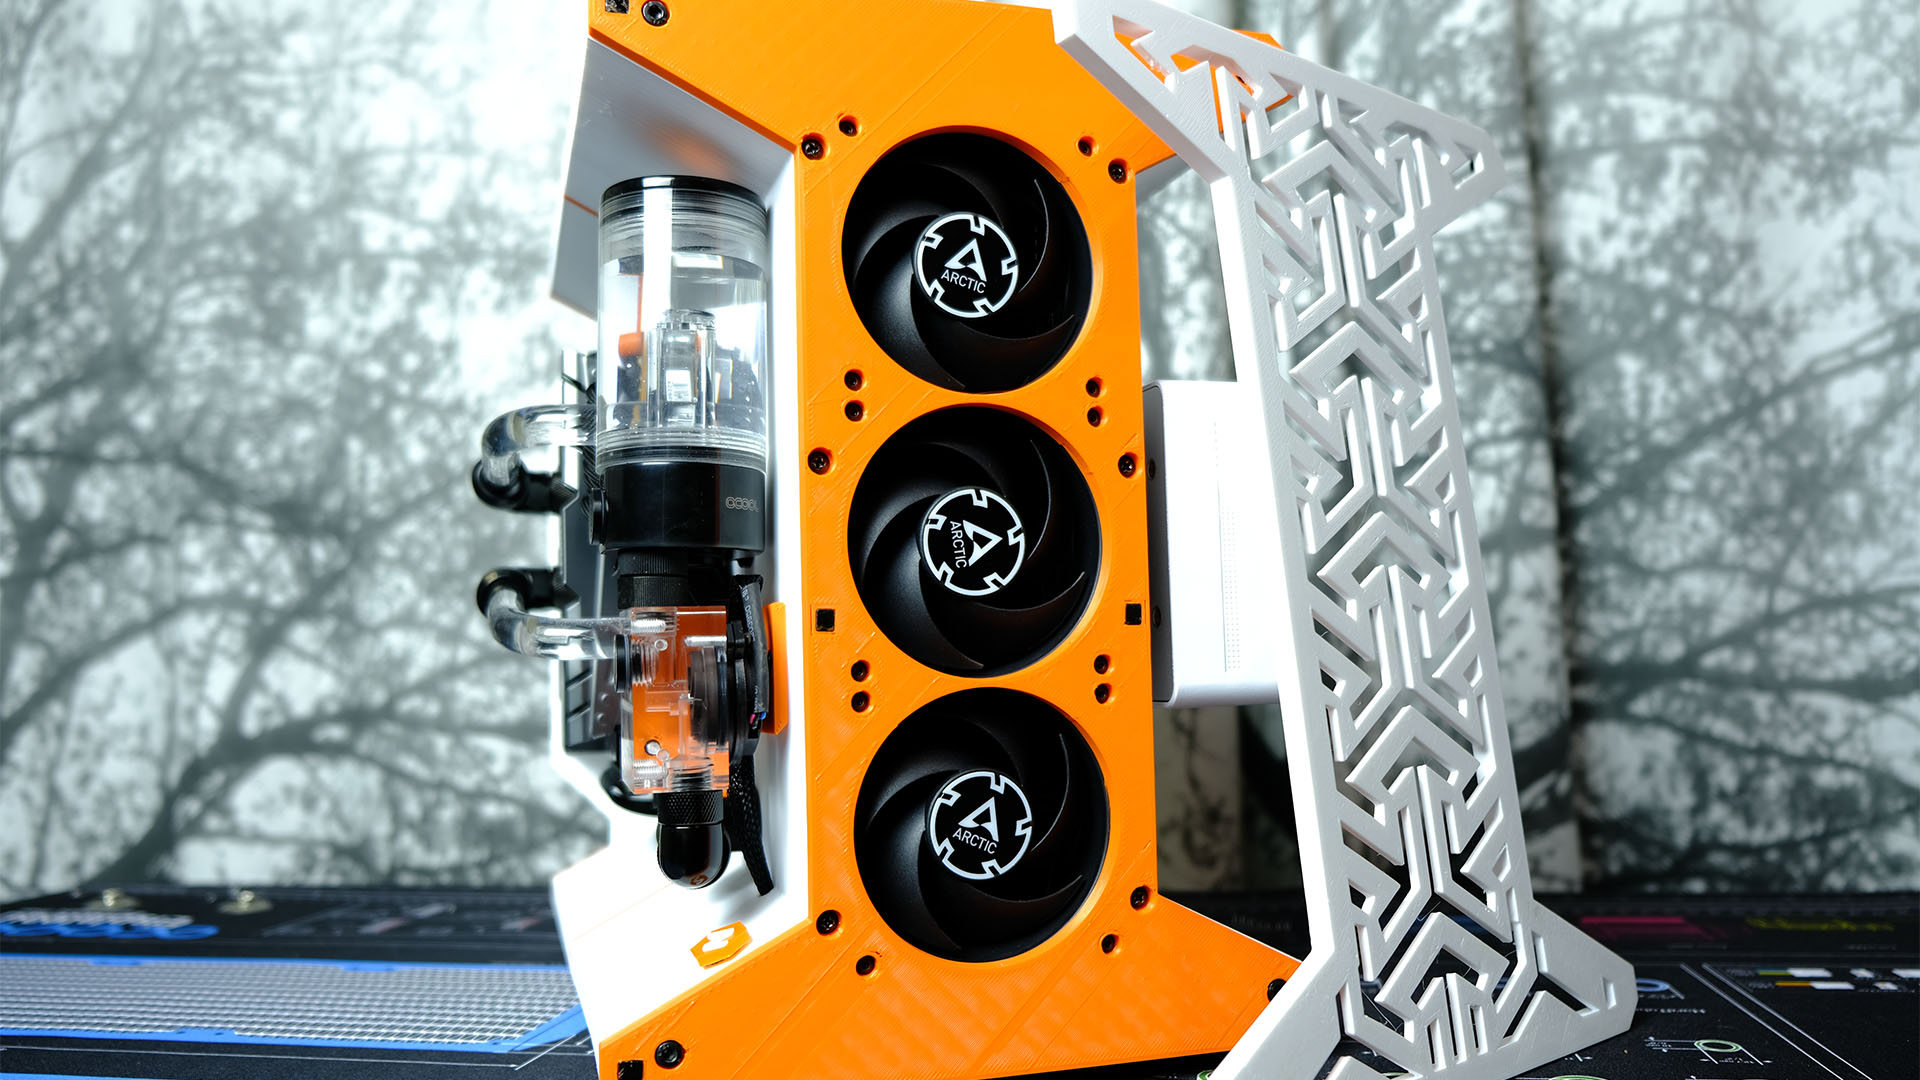
One of the most prominent features of the case is its fan grilles that cover the front intake fans, the rear exhaust fan and the GPU exhaust on the side. Figuring out what design to use for this took a long time and scrolling through hundreds of pages of different designs. Eventually, I settled on my own pattern based on a repeated three-arrow shape.
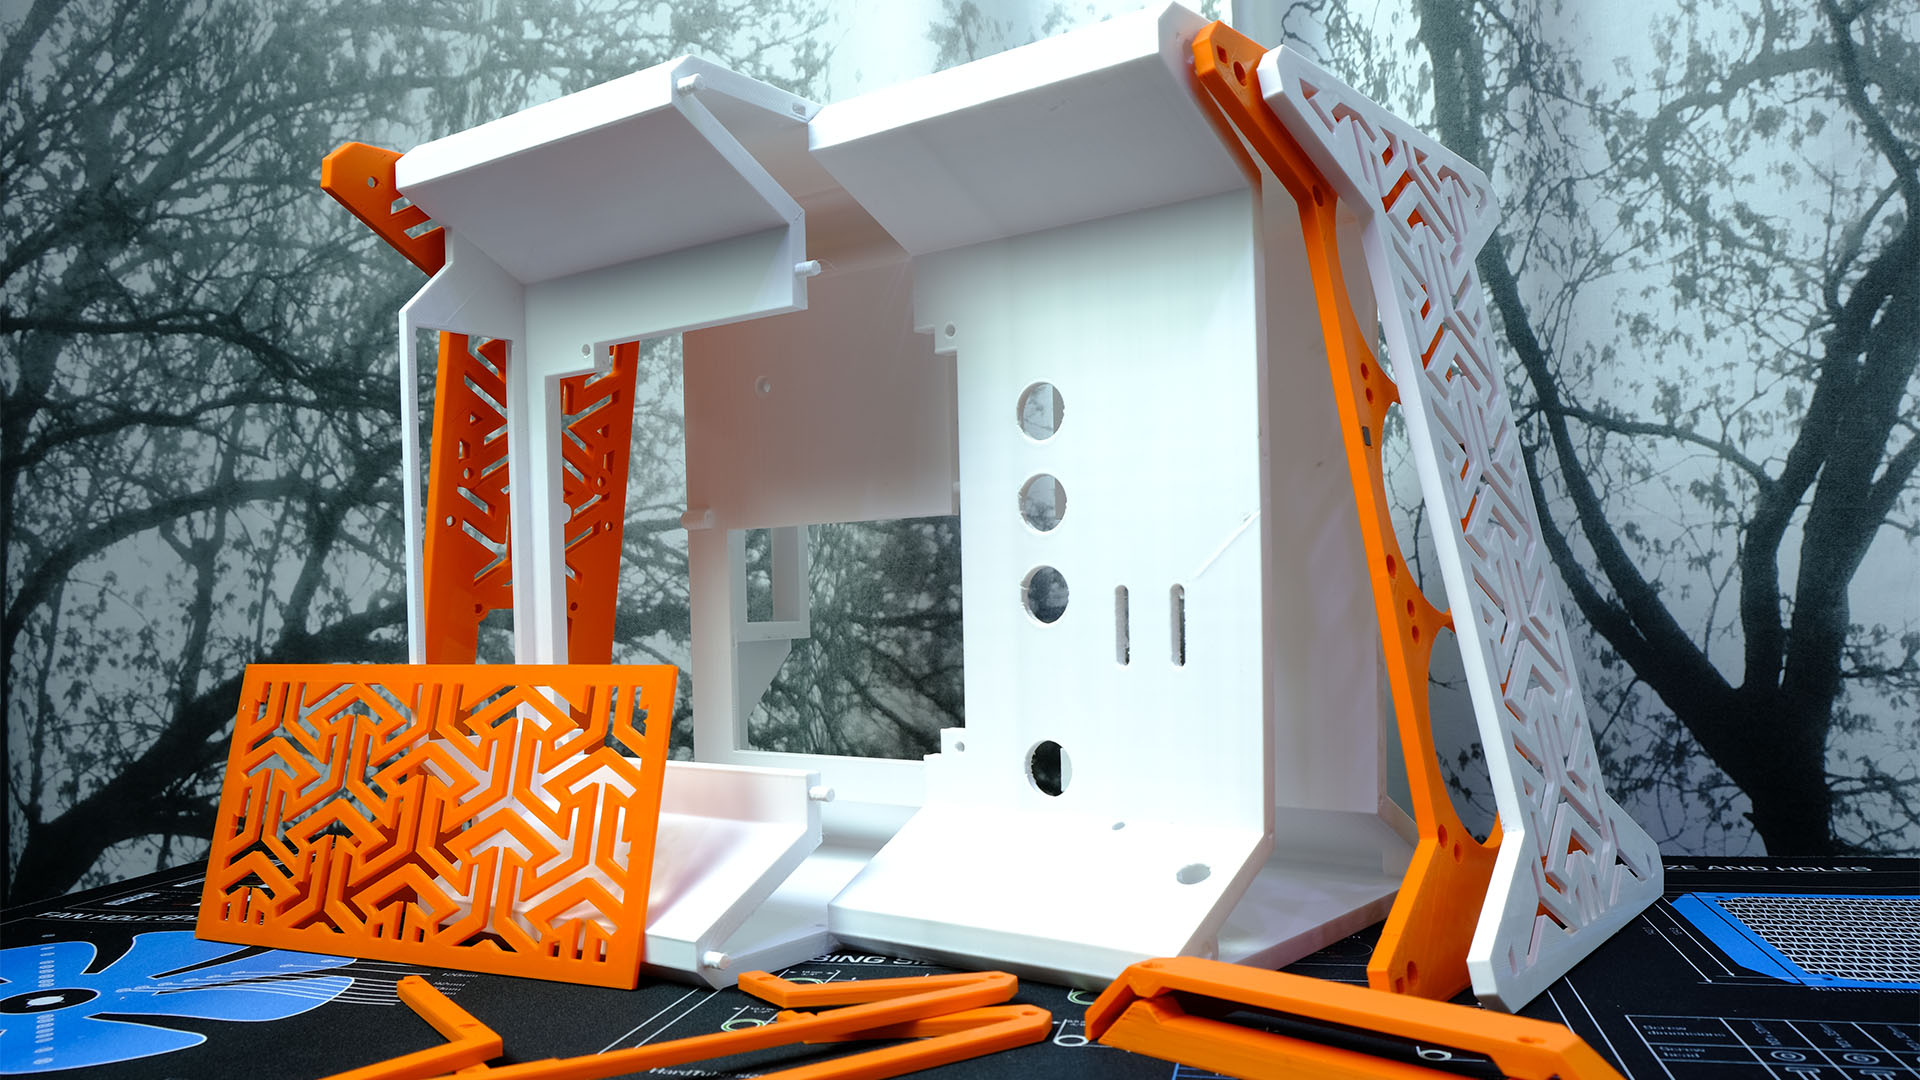
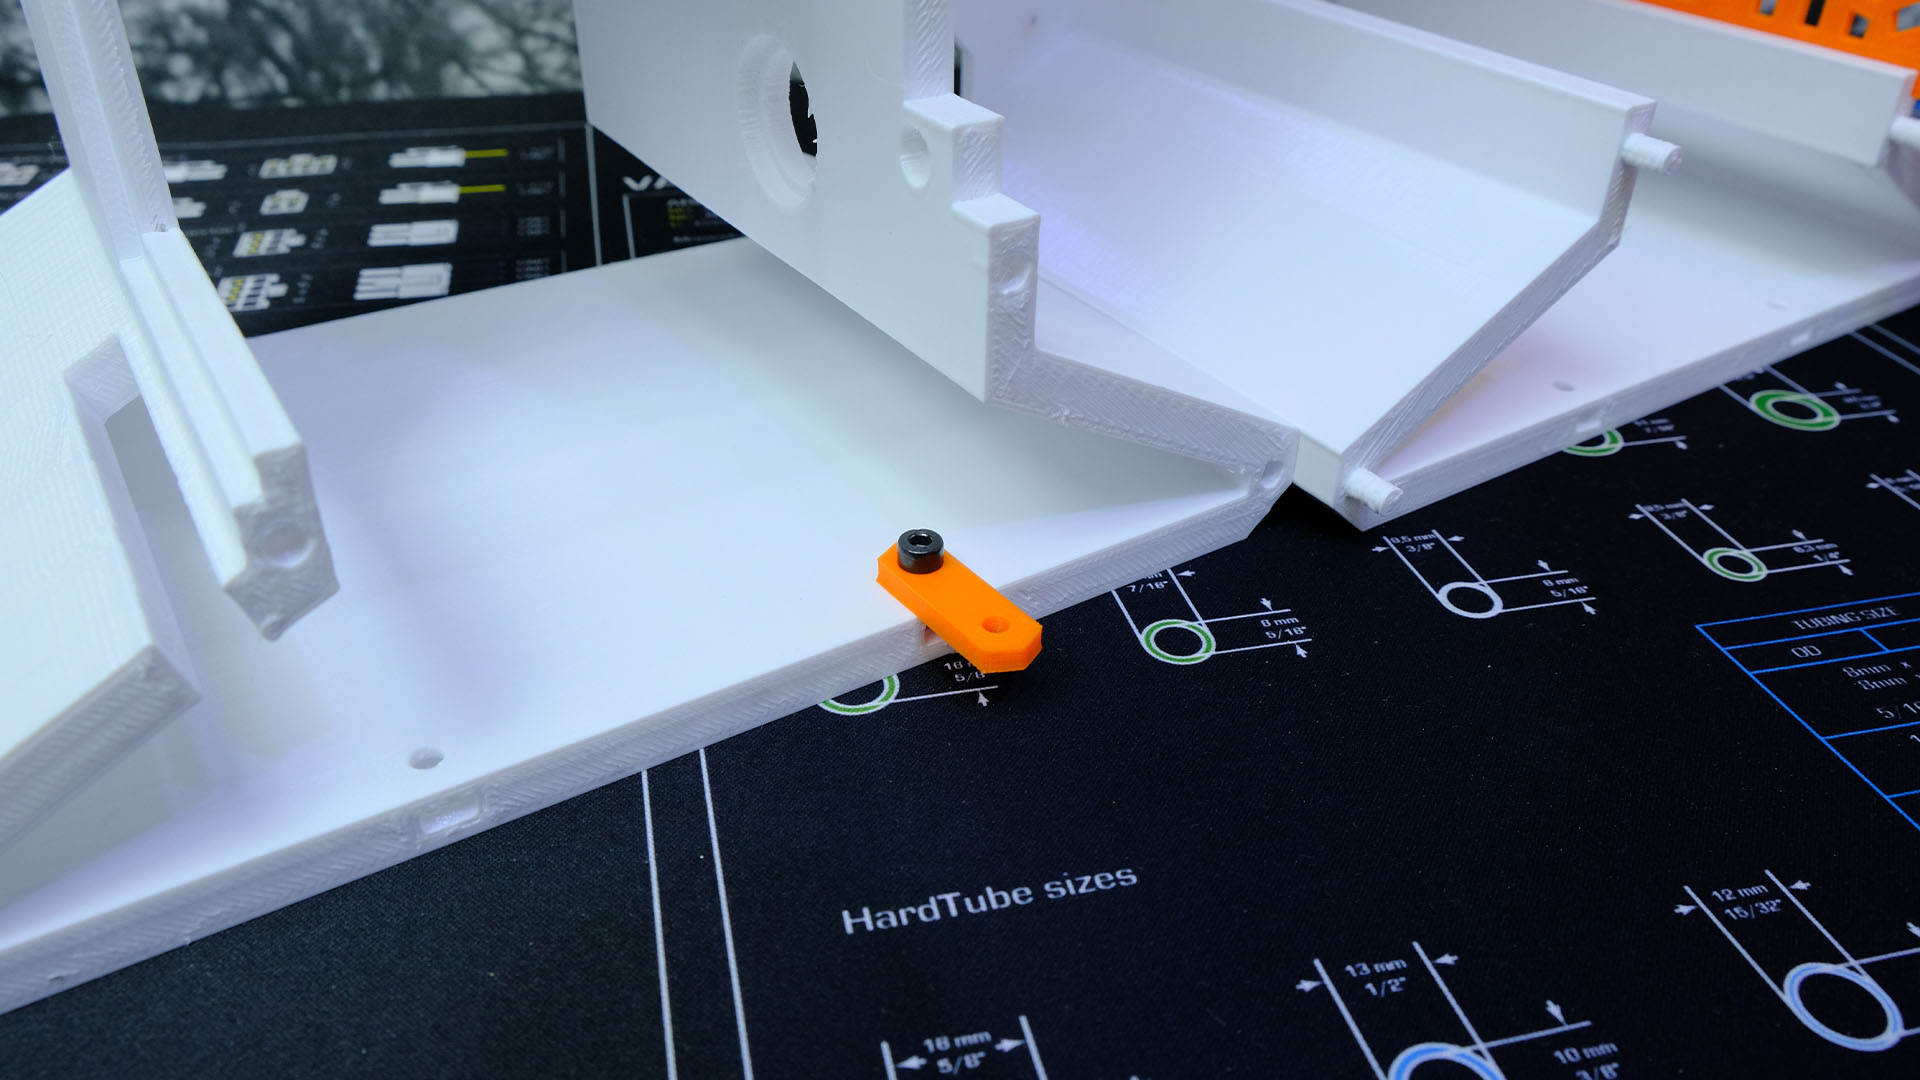
One of the most difficult things to figure out was a way to ensure that you don’t have to glue any of the case’s parts together, and instead everything can be taken apart easily. The front grille, for instance, is attached with recessed magnets while several of the panels are bolted together.
Choosing the colors used in the build was one of the easier choices. White and orange are the colors we’ve chosen for the interior of our home, so the new PC should fit right in. As for why it’s called The Thing, when I started to write my project logs for the build, to document my progress, I didn’t know what to call it, so the best I could come up with was The Thing.
Picking the parts
The basic layout of the case was ready but I still didn’t have any hardware to put in it. So, I started to reach out to manufacturers for help with the parts. This took many months but I was so lucky that Gigabyte/Aorus and TeamGroup joined to sponsor this build, providing the GPU and motherboard, and SSD and memory respectively. As for water cooling, I’ve teamed up with Alphacool many times, and the water-cooling firm stepped up to the plate as usual.
I only really had one key requirement for the components, which was for the GPU length to be just right. Because of the way the GPU sits on the side of the case, I didn’t want it to be too small or too big but just right. Thankfully, the Vision GeForce RTX 3060 that Gigabyte sent fit both the length requirements and the style of the case perfectly, so I didn’t have to change my design for it.
This mod doesn’t have extreme hardware but I don’t need top-of-the-line components with my daily work and casual gaming. It will be easy to upgrade to a better CPU if needed, and there’s one spare M.2 slot for upgrading storage too. That’s why I put the 512GB drive in the back slot on the motherboard.
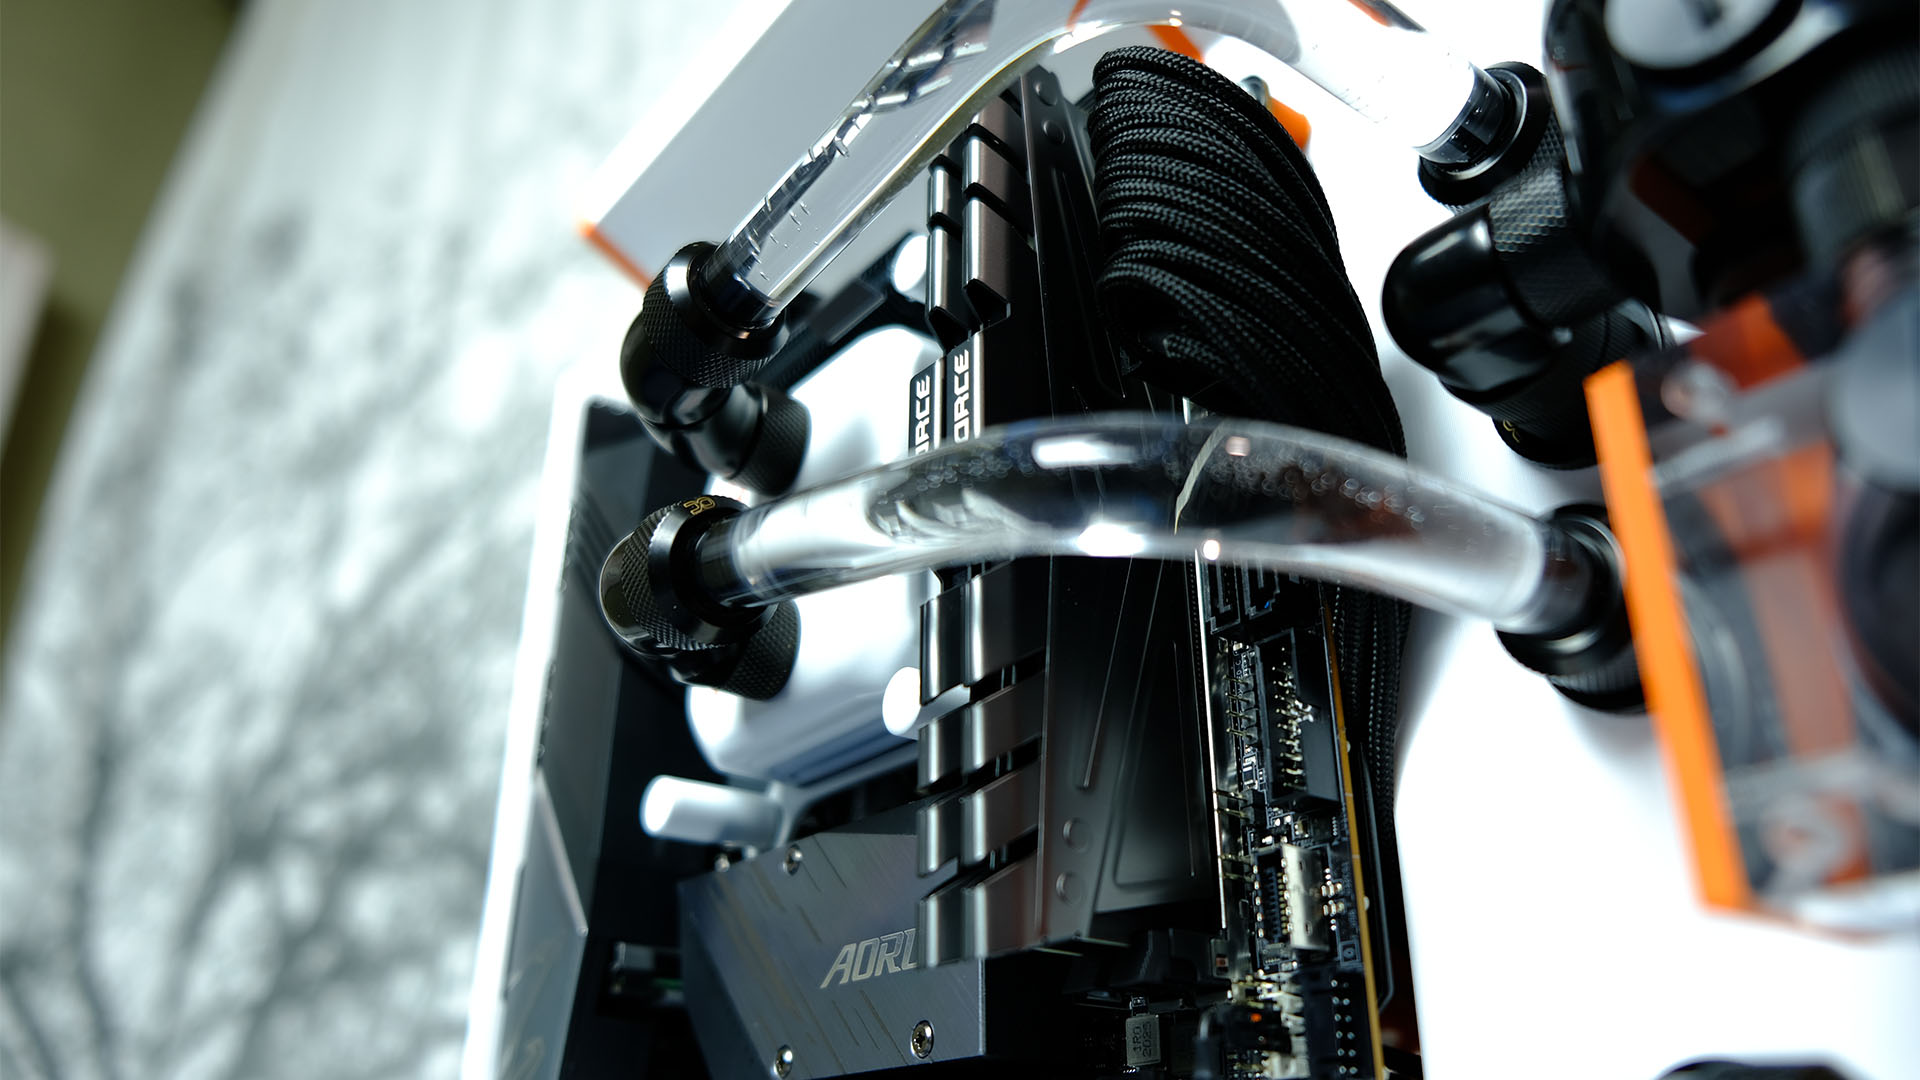
When it came to the fans, I used ARCTIC P8 PWM PST 80mm models and they work really well in this build. There are three fans on the radiator, which are daisy-chained together, so they use fewer cables, plus there’s another fan in the back panel.
Let the printing begin
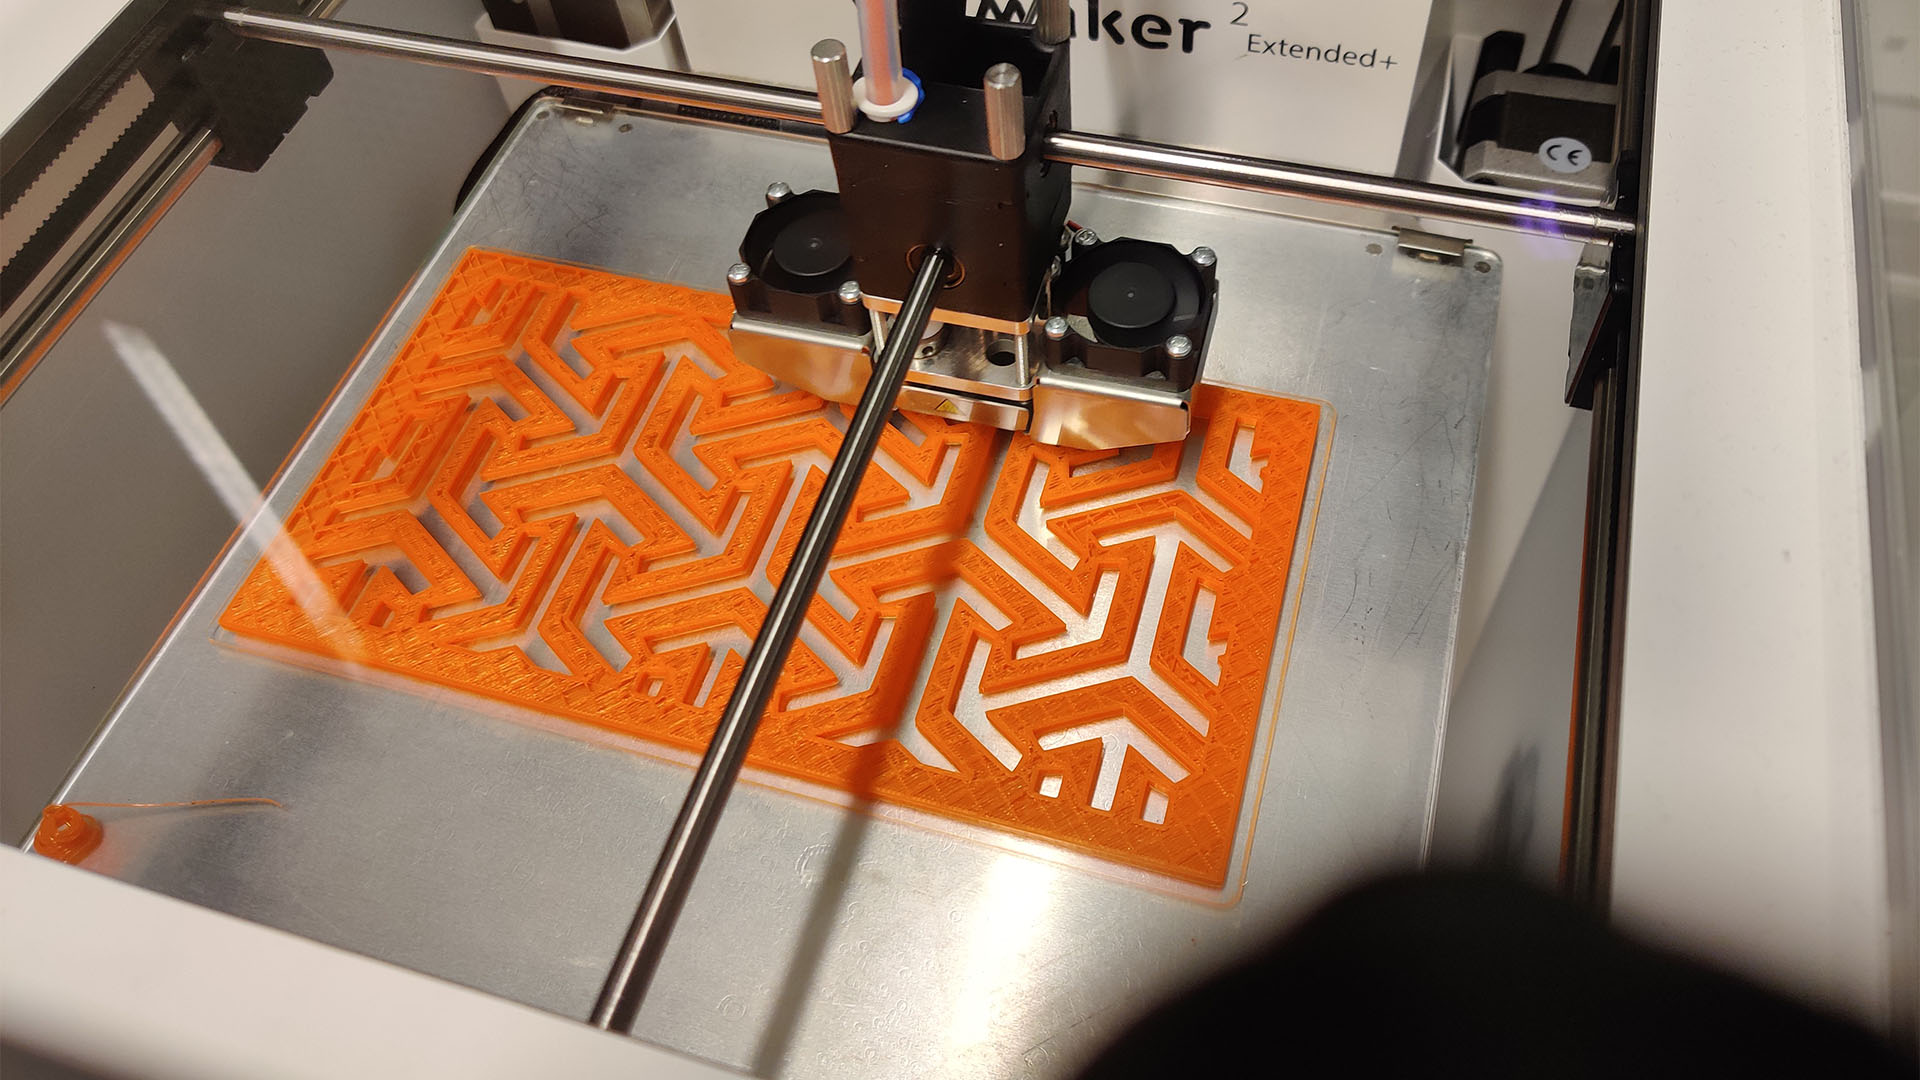
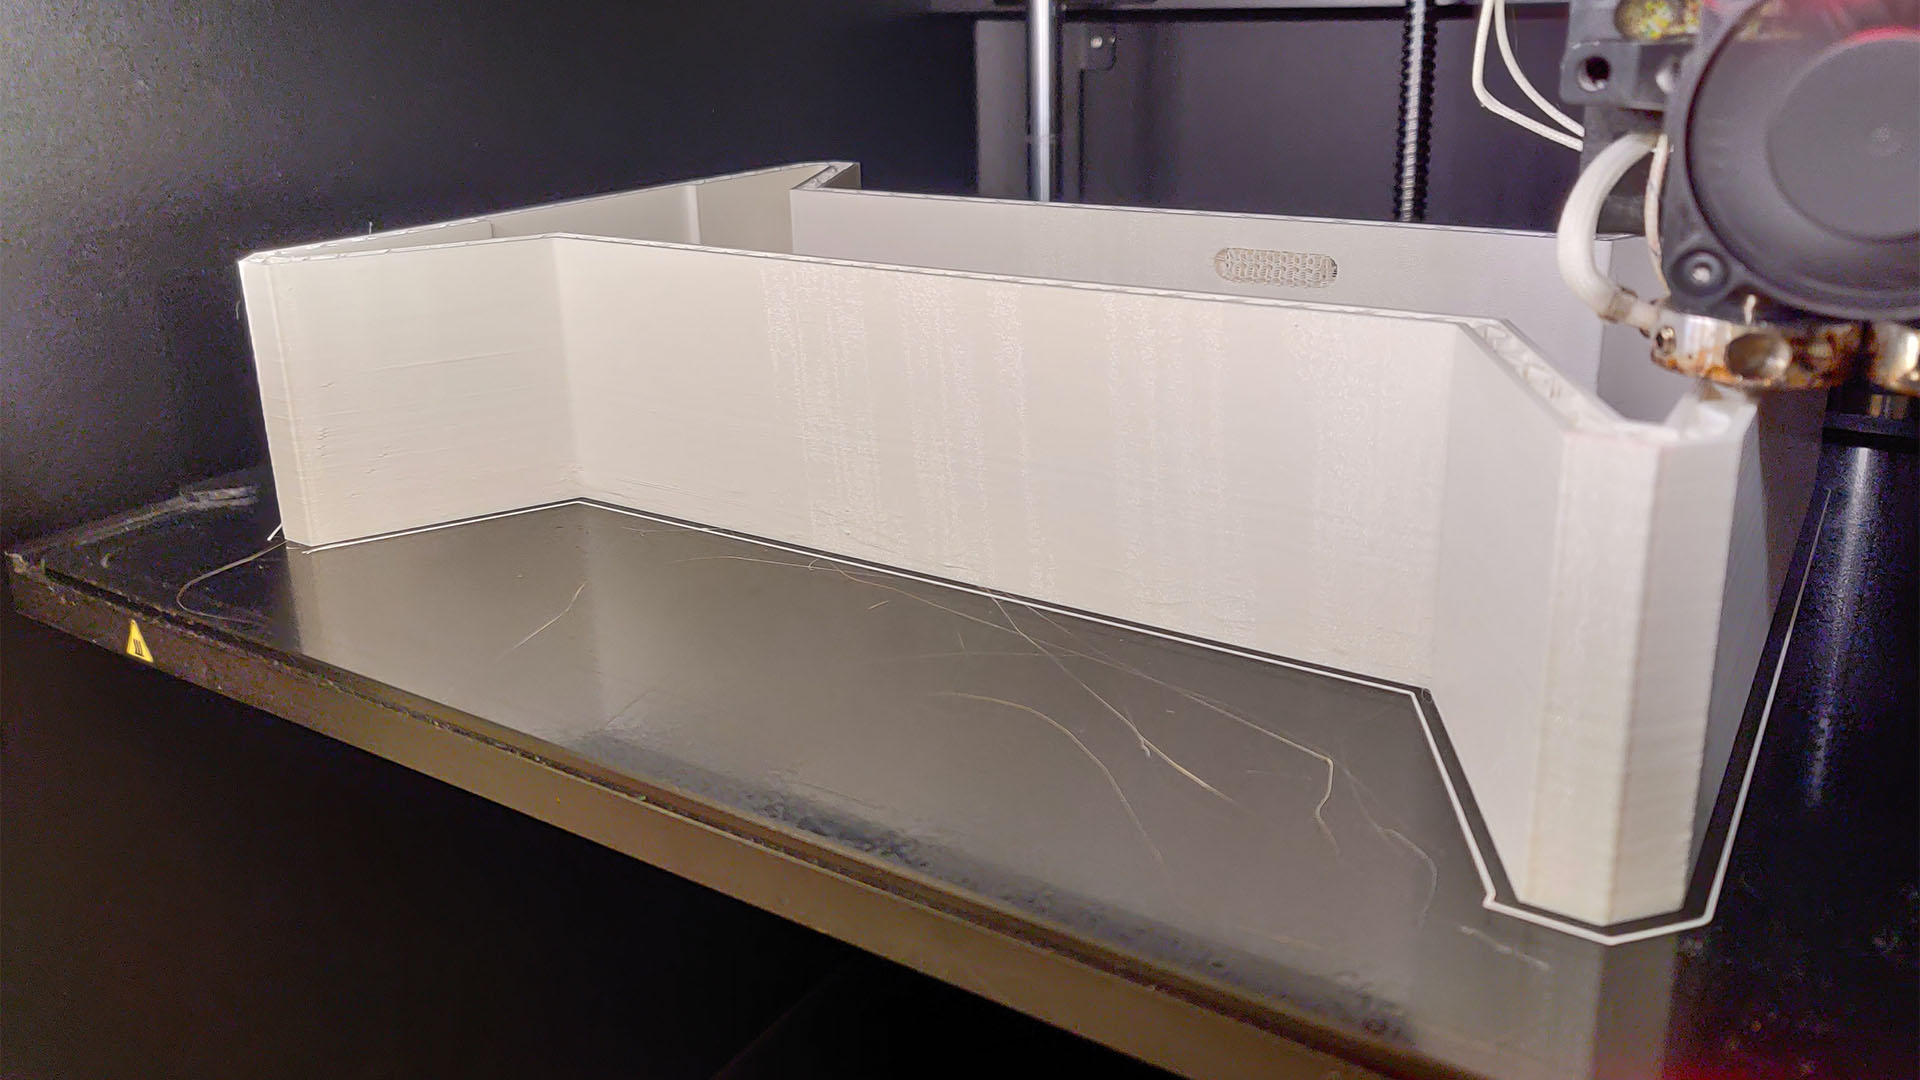
My first prototype was printed in PLA plastic because it’s easy to print and works fine as a prototype material. I am so lucky because I can use my workplace’s 3D printing gear – there’s one bigger printer – the Minifactory Innovator, and two smaller Ultimaker 2 Extended+ printers. For those of you who are interested in 3D printing, for this first print I used a 0.5mm nozzle, 0.3mm layer height, five top/bottom layers, a wall thickness of 1.5mm and 12 percent infill.
Initially, I wanted to print this case as one big part, with separate covers/grilles for the front and back, but the 3D printing time was over 70 hours, so I split the case in two parts. As I was printing the first part there was a jam at the 3D printer’s nozzle, so the print came out 16mm short. This was frustrating, but 3D printing isn’t always easy, so I just had to keep moving.
After I finished the front part of the case, I did a test fit of the water-cooling parts and they slotted into place perfectly. Now was the time for the back half of the case and here I took advantage of the missing 16mm from the front. Instead of scrapping that piece and starting again, I simply made an orange spacer to fill the gap. The end result was so good that I incorporated it into the final design.
When I had all of the 3D-printed parts ready, it was time to test-fit everything, and unfortunately, there were so many problems with the cable routing for the motherboard and GPU that I had to do some major changes. I also forgot to add a power button, so it was back to the drawing board for that.
At this point, I had a recycling bin full of prototype parts, but that was always going to be likely when designing a 3D-printed case from scratch. One week later, I almost had a working model but I still had to resolve how to secure the two case halves together; thanks to the help of viewers on my worklog, I came up with a plan for what would be easy to implement on the 3D model.
With all the prototyping and testing done, it was time to print the final version of the case. For this I used PETG, because it’s easy to print and it can withstand more heat than PLA. The PETG I used was ColorFabb Economy white, which I chose for two reasons: it has a good white color and there’s 2.2kg material per spool, so there’s plenty to work with (thanks to all the not-so-good test prints, I used two of these spools).
It was a nerve-wracking 36-hour wait for the print, just for the one half of the case, but the print came out nice and I was so happy of the end result. A little more confident, I then set the print going for the other half only to return the next morning to find that the print was so bad I had to bin it. Thankfully, it only took one more attempt to get as good a print as the front part.
The orange parts of the build were easy to print because almost all off the parts were flat and small. I used both PLA and PETG for them, as these parts aren’t as structurally important.
The assembly
My plan was to paint the case, but as the print quality and color was so good, I changed my mind and used the parts as they were. There was some cleaning up to do first, such as removing the support material, which I did with a sharp knife. There are a couple of imperfections on the prints but it didn’t bother me too much and more important to me is now you can see the layer lines, so you know it’s 3D printed.
Finally, it was time to assemble the PC, and I was so nervous that I had forgotten something. The build order for this case was very exact so there was plenty of room for mistakes. First, I added the water-cooling components to the front part of the case. I used soft tubing on the inside because it’s easier and I think more secure that way.
Next, the two parts were joined together. Because of where the motherboard is placed, I had to connect all the cables and route them to the back side of the motherboard. The fit was so tight that I had to cut away a piece of the motherboard’s metal back panel.
Cable management was hard because the case isn’t big on the inside, but I eventually managed to neaten the cables, and they don’t block airflow. Hardline tubing was up next, and this was my first time doing hardline tubing, so I was extra nervous.
Thankfully, there were only two 90-degree turns, so there wasn’t a lot of difficulty with regard to tube bending. After a successful leak test, I was relieved to be nearing the finishing line for this build.
The next few stages were to fit the front grille and the grille on the back of the graphics card. These are secured with magnets, so it’s a nice and easy way to get inside to the case if I need to service anything. Last but not least, the graphics card was put in its place and I’d finished my own 3D-printed mini-ITX case.
The Thing
Building The Thing had its ups and downs, but because it’s so easy to make prototypes and change the design when 3D printing, this made the whole process easier. I’m not an expert 3D modeler or 3D printer but I have learned so much working with this case and got lots of help from viewers on my project log. For this project, I used Autodesk Fusion 360 and Microsoft 3D Builder (you may laugh at me using such basic software but it’s easy to use for making basic models).
Using 3D printing is such a good way to get into case modding because not everyone can access laser cutting or metal shops capable of making the designs we want. I’m lucky that I can use my workplace 3D printers to do my mods, and they’re expensive printers, but even basic printers can get the job done. You just need patience and lots of filament.
Overall, I’m very pleased with the end result of this mod. It has also featured in mod of the month competitions on both bit-tech and builds.GG, which I’m very happy about. There are a few things I might do differently next time though.
The most obvious one is that I didn’t think to add an easy way to drain the water-cooling loop, so that’s going to be fun when it comes time to give the system a clean. As for my next mod, I have teamed up with Jonsbo, so something cool is incoming and I am so excited to finally use wood filament.
The Thing 3D printed PC specs
- Sponsors: Alphacool, Gigabyte, Aorus, TeamGroup
- Case: Custom-made, 3D printed
- CPU: Intel Core i5-11400F
- Motherboard: Gigabyte Z590I Aorus Ultra
- Graphics card: Gigabyte Vision GeForce RTX 3060
- Memory: 16GB Teamgroup Dark Z
- PSU: SilverStone SST-SX650-G (SFX)
- Storage: 512GB Teamgroup T-Force Cardea Zero Z340 SSD
- Cooling: Custom water cooling with Alphacool parts
We absolutely love this build by Antti Väisänen – the clean lines and unique chassis look superb, and we’re amazed that the whole thing was 3D printed.
This post originally appeared on Custom PC, which has been covering amazing setups for over 20 years and is now part of PCGamesN. Join our nearly 500k member Facebook group to discuss this build.
If you consider yourself to be an expert PC builder, you can submit your own custom PC build to us today for a chance of being featured on PCGamesN in the future.
